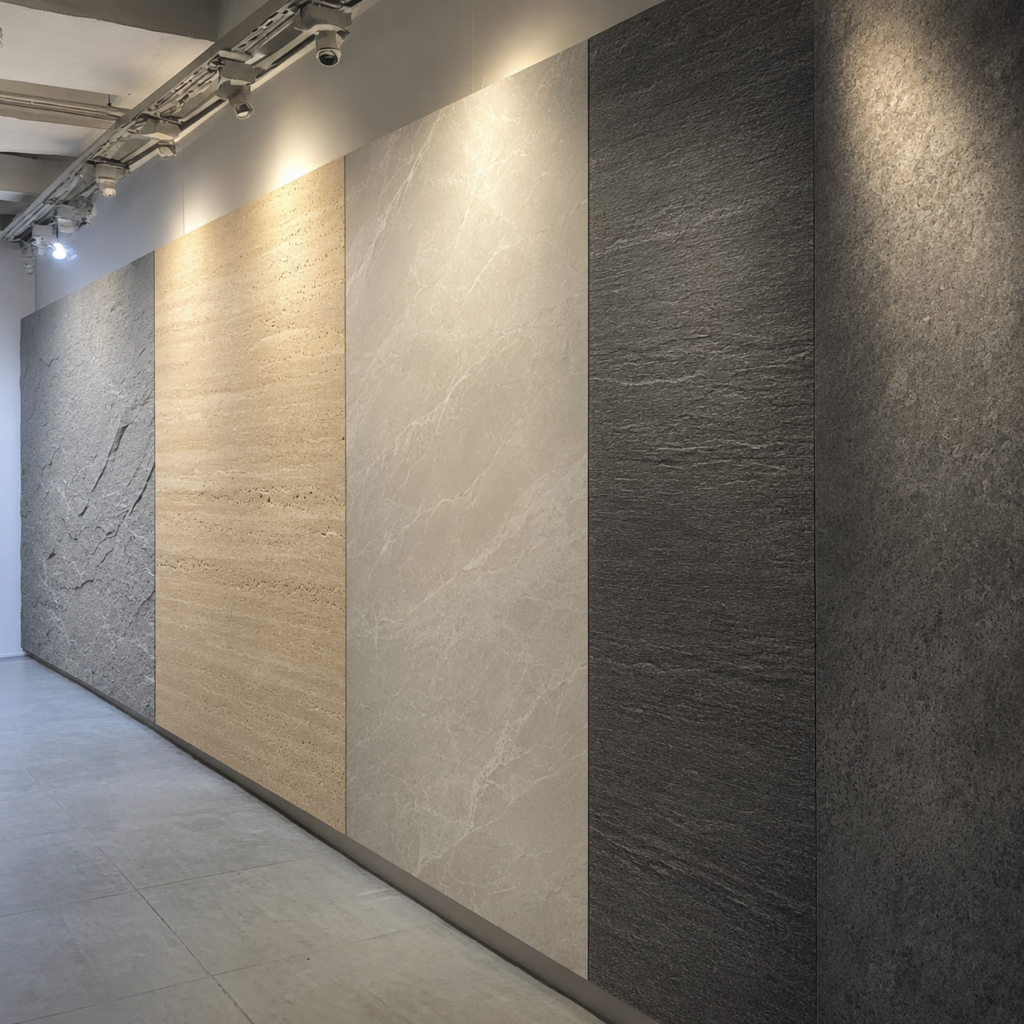
By Sytech
 03 Nov, 2026
 19 Minutes Read
Flexible stone panel installation comes down to three decisions made before any adhesive is opened: the substrate must be flat, sound, dry and dimensionally stable; the adhesive must match that substrate and the exposure the wall will see, applied full-bed rather than in spots; and joints must be designed to take up movement at panel seams, corners and perimeters instead of being forced tight. Get those three right and the panels behave. Get any one wrong and the failure shows up as telegraphing, edge lift or a crack line that follows the trowel.
Key takeaways
Installers who come from tile work get caught here first. A 10 mm ceramic tile sits on a mortar bed that absorbs unevenness in the wall behind it. A flexible stone panel in a thin, non-mortar-bedded format has no bed to hide anything. Every ridge, trowel mark and board joint under it prints through the decorated face as the adhesive cures, and it cannot be sanded out afterwards.
Four properties decide whether a substrate is acceptable. Check them in sequence, because a later one can be fixed and an earlier one usually cannot cheaply.
Cement-rendered masonry is the most forgiving mineral base, provided the render is fully cured and not dusting. Gypsum plaster and plasterboard suit dry interior work but have high suction and need priming. Fibre cement board is dimensionally predictable, though joints must be flush and dust removed. Plywood and timber boards move, so board joints and fixing patterns matter as much as surface prep. Existing tiled walls need the glaze abraded and every hollow tile removed or the panel will bond to a loose tile that later debonds. Painted walls are the trap: gloss paint, release agents and curing compounds are bond breakers, and abrading plus a suitable primer is what turns them back into a bondable surface. On metal and composite substrates, direct adhesive pasting may not be the correct attachment at all, and a mechanically fixed approach belongs in the discussion.
Adhesive trapped under a panel that does not breathe cannot dry back the way a porous finish can. That is why a wall reading damp on a meter should not be primed and covered in the same week. The substrate should be clean, dry, stable and free from dust before any panels are fitted, and loose material has to come off rather than be primed over.
Acceptable substrate types, flatness tolerances and primer requirements are model-specific. They must come from the current installation manual for the panel you are actually fixing, not from a generic guide, because thickness and flexibility vary across the soft porcelain and MCM panel range.
The default failure on site is buying one adhesive for the whole project because it worked on the last job. Adhesive selection follows from two inputs: what the substrate is made of and what the panel backing is made of. Exposure decides the third. Flexible stone-look panels use a flexible MCM or soft porcelain base with a water-based, inorganic, non-fired inkjet decorative surface, and that backing behaves nothing like a rigid stone face. The wrong adhesive either fails to grab or shrinks and pulls the edges in.
Three families cover most of the work. Cementitious polymer-modified powders, the C1 and C2 classes in EN 12004 terms, are the default on mineral substrates such as cement render, concrete and fibre cement board: they are less sensitive than other families to residual moisture in that substrate, but they need water to cure and they set rigid. Dispersion adhesives, supplied ready to use as a water-based polymer paste, are flexible and convenient on absorbent interior walls in dry service, and they are the wrong choice wherever the wall or the room stays wet. Reactive resins, meaning epoxy, polyurethane and silane-modified polymer products, give high grab and high flexibility on metal, composite and other substrates that do not absorb water, at the cost of a higher price and a shorter working time. Treat the list as a starting filter, not an approval: the specific adhesive type, coverage rate and open time have to be confirmed against both the panel manufacturer’s current instructions and the adhesive manufacturer’s datasheet.
A notched trowel held at the correct angle produces ribs that flatten into full contact when the panel is pressed and slid into position. Spot bonding, or dabbing adhesive at the corners and centre, leaves voids behind the panel. Those voids flex under impact and thermal movement, and the result is drumming, then a crack line, then edge lift. Full-bed contact is the standard, and the trowel notch size must suit the flatness you actually measured rather than the flatness you hoped for.
Adhesive that has skinned over before the panel lands gives a bond that looks fine on day one and releases later. On a sun-facing elevation in a hot climate, or in a draught through an unfinished building, open time collapses. Work in smaller adhesive areas, keep the trowel angle consistent, and if a skin has formed, scrape it off and re-apply rather than pressing the panel into it.
Mixing ratio, pot life and water quantity are fixed by the datasheet. Adding water to stretch a batch changes the polymer-to-cement balance, weakens the bond and increases shrinkage, which shows up as joint and edge problems weeks later. Back-buttering helps on high-absorption or locally uneven substrates, and lifting one test panel to inspect contact before committing the elevation is the cheapest quality check available. On cementitious adhesives, alkali and moisture interaction can also affect appearance at joints and edges, which is why residues should not be left on the decorated face.
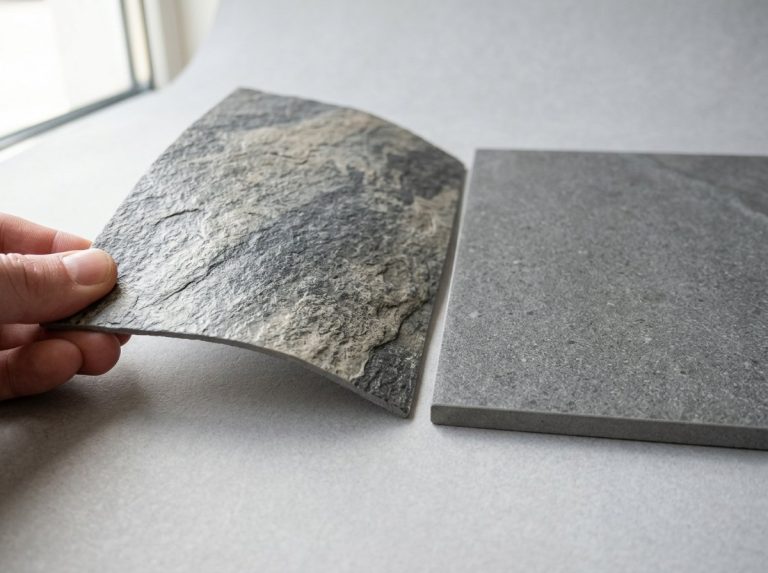
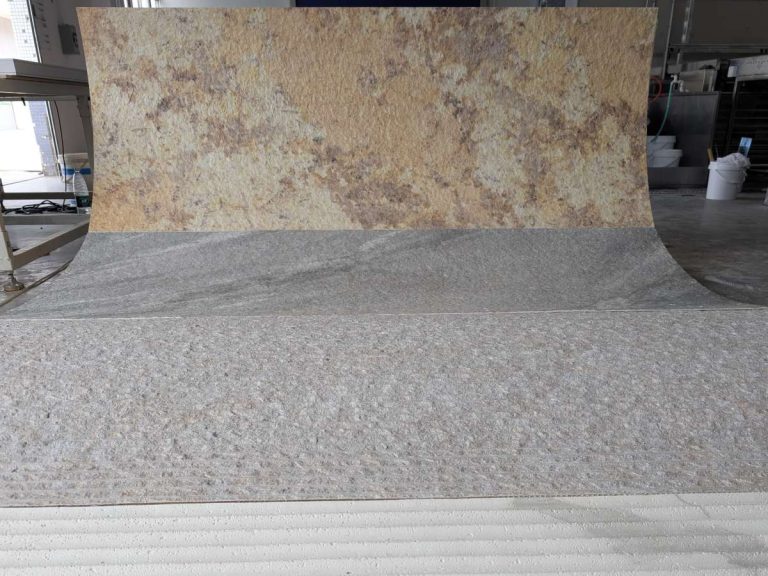
Panels that have been rolled or stacked in transit will not lie flat on the wall. Bonding them while they are still curved loads the adhesive in peel from minute one. Flatten first, then lay out, then cut, then bond.
Panel sizes range from 600×1200 mm up to 1200×3000 mm depending on the product line, so a layout that works for one model may not transfer. Large formats demand more accurate setting-out and two-person handling. If you are weighing a panel against a quarried alternative on appearance and handling grounds, the flexible stone versus natural stone veneer comparison covers where each one wins.
Every cladding assembly moves. The panel, the adhesive, the substrate and the structure respond differently to heat and moisture, so a wall laid tight with no relief has nowhere to put the strain. Joints are the mechanism that absorbs it. Treating them as a cosmetic gap is how walls end up with tented seams and hairline cracks that follow the adhesive trowel.
Two approaches work, and they are not interchangeable. A tight-butt joint with a chamfered or bevelled edge gives a monolithic look and is the right choice where the system permits it and the substrate is stable. An open joint of defined width reads as a designed shadow line and tolerates more movement. What fails is a tight joint on an unstable substrate, forced closed by hand and pressed until the edges touch.
A gap at floor level, at ceilings, around columns, at door frames and at intervals along long runs is a requirement. Close it with a compliant sealant or a designed profile, never with grout or a rigid filler, which simply transfers the movement back into the panel. Intermediate movement joints should follow the structural joints and the substrate’s own joint layout rather than being invented on site by eye.
Elasticity class, adhesion to the decorated face versus adhesion to the substrate, and primer requirements all matter. A paintable acrylic and a movement-capable silicone or hybrid are different products with different jobs. The decorated surface of a flexible stone panel is a printed, non-fired finish, so adhesion testing on an offcut before running a full elevation of sealant is worth the twenty minutes.
Mitred, overlapped and profile-finished corners each behave differently when the two faces sit on different substrates or see different sun exposure. A corner where one return is in shade and the other takes direct afternoon sun will move more than a corner on a flat, evenly loaded wall. The MCM and soft porcelain material page is the place to confirm what the current model allows before detailing.
Watch for the warning sign during installation: panels forced tight showing a slight bulge or ripple along a seam. That ripple is the wall telling you the allowance is wrong. Fix it before the adhesive sets. Joint widths, sealant types and whether tight-butt joints are permitted at all are system-specific and must be confirmed against current product documentation and the project specification.
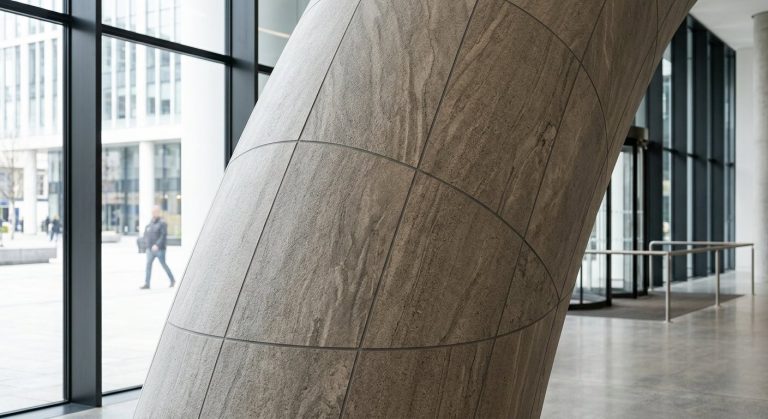
Flexibility is a property with a limit, and the limit is not published as a single number across a product range. Every panel model has its own minimum bend radius, and the honest way to establish feasibility is to wrap a sample around a pipe or formwork of the actual project radius on site. Estimating from thickness is how a column ends up half-clad with a panel that wants to spring back.
Which face goes to the outside of the curve changes behaviour, and bending across the print or grain direction behaves differently from bending along it. Test both if the curve is tight, then mark the permitted orientation on the panels before the crew starts, because once the stack is mixed nobody remembers.
Plan the wrap so the closing seam falls on the least-viewed face and the last panel does not have to be stretched or compressed hard to close. Starting from the seam and working away from it, or working toward a corner return, usually gives a cleaner close than starting at the most visible point and discovering the error at the back of the column.
A void behind a curved panel is under permanent peel stress, and peel starts at an edge and runs. Adhesive coverage and contact pressure become more critical on a curve than on a flat wall, not less. Temporary support during cure on vertical curved work needs to hold the panel in contact without marking the decorated face or crushing the edge: soft-faced battens and low-tack tape on protected surfaces, removed while the adhesive is still green enough to release.
Very tight radii, double curvature and complex transitions often look better faceted, using several flat panels with tight joints, or resolved with a formed trim at the transition. A panel forced into a radius it was not made for telegraphs every bit of that fight. On exterior curved work, weather exposure adds to the peel load, so attachment and joint sealing need reviewing together as a system rather than separately.
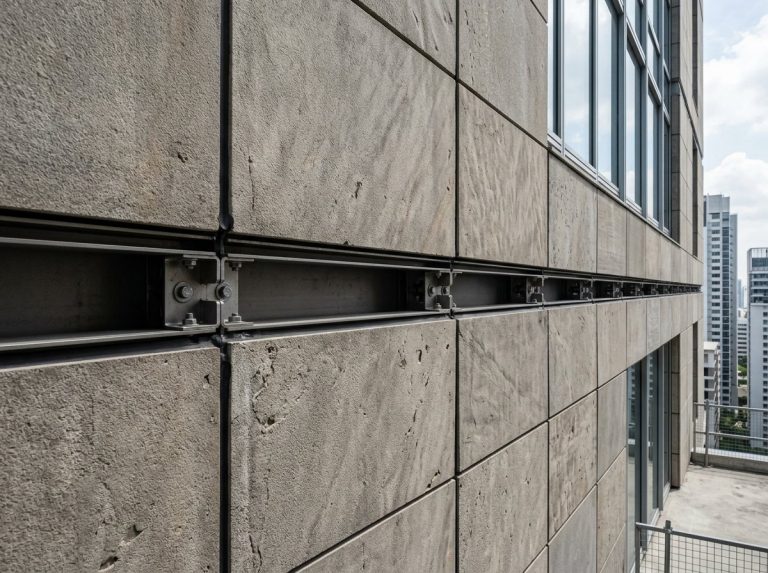
An exterior installation is a different system, not the interior method with a different adhesive. Direct adhesive pasting and a drained rainscreen are two distinct approaches with different risk profiles. Bonding depends entirely on continuous adhesion and a stable substrate. A rainscreen moves water and wind load into a cavity and a substructure, and the panel carries far less of that job itself. Confusing the two is how facades get specified on the wrong basis.
On a bonded exterior wall, sealant joints and flashings at openings, copings and sills carry the whole defence. There is no cavity to drain a leak, and a bonded panel is unforgiving of water getting behind it. If the detail cannot guarantee that water stays out, a drained and ventilated approach is the honest answer, and how rainscreen facades work is worth reading before the method statement is written.
A facade cycles through daily and seasonal expansion and contraction. That cycling loads the bond line, the joints and the panel edges in a way an interior wall never does. Angtai’s panels carry a manufacturer-reported test temperature range of -40°C to 150°C, but material temperature tolerance is not the same as an approved exterior assembly. Freeze-thaw exposure, coastal salt spray and high-UV locations must each be checked against the specific model rather than assumed from a general product claim.
Cementitious bond lines and the base of a wall are where efflorescence and staining appear first. Detailing that keeps water running off rather than soaking in, plus salt-free materials at the base, reduces the risk. Angtai panel surfaces are rain-washable and easy-clean, which helps maintenance but does not replace correct drainage detailing.
Material-level classification is not assembly-level compliance. Facade fire requirements are set by the local code and tested as a complete system, so no panel should be specified on surface classification alone, and no supplier should be assumed to have passed an assembly test unless the report for that assembly is in hand.
Before an exterior method statement is signed off, request the current installation manual for the specific model, adhesive and sealant datasheets, the substrate specification, and any test reports relevant to the intended assembly. Exterior suitability depends on product, substrate, attachment method, local building codes and verified system specifications. The exterior stone panels guide covers the wider selection side of that decision.
Inspection is worth more in the first hour than in the first month, because almost everything correctable is correctable only while the adhesive is still green.
Angtai panels carry a manufacturer-reported Grade 4 internal wear rating, which is a surface durability statement rather than a licence to skip site protection.
Adapt this to your own method statement rather than adopting it as written, because the tolerances and permitted products belong to the model you specified.
Ask for the current installation manual for the specified model, adhesive and sealant recommendations, substrate requirements, the available sizes and thicknesses for that finish, and any test documentation relevant to the intended application. Get it in writing before the purchase order, not after the first delivery.
ANGTAI Materials supplies flexible stone, MCM, soft porcelain panels, stone-look thin veneer alternatives and foamed ceramic panels factory-direct, with OEM/ODM and custom pattern options. Quotations are typically provided within 24 hours once complete project information is received, samples are generally dispatched within about 5 business days after price confirmation, and production typically runs 25 to 30 days depending on specification. Confirm current sizes, thicknesses and installation requirements against the model you are considering, and check what drives flexible stone pricing before you build the budget. Send your elevation drawings and substrate details and we will come back with the specification that fits.
Yes, provided the existing tiles are sound and the glaze is abraded. Tap every tile first and remove any that sound hollow, because a panel bonded to a loose tile will debond with it. Glossy glazed surfaces also need a suitable primer, and the panel manufacturer's current manual should confirm tile is an approved substrate for that model.
It depends on the substrate and the exposure. Cementitious or polymer-modified cementitious adhesives suit mineral substrates and wet or exterior conditions, dispersion adhesives suit dry interior work on stable boards, and specialist systems apply only where specified. Confirm the exact product against both the panel installation manual and the adhesive datasheet before ordering.
Wait until the adhesive has fully cured as stated in the product instructions. Cleaning too early introduces water at the panel edges while the bond is still gaining strength, which can lift an edge that would otherwise have held. Protection from other trades during that period matters as much as the cleaning schedule.
03 Nov, 2026
27 Oct, 2026

13 Oct, 2026
10 Oct, 2026
 Guidelines
 Guidelines
 Guidelines
 Guidelines
 Guidelines
 Guidelines